Purple Haze Soft Hackle Tutorial
Posted: Sat Oct 19, 2019 8:02 pm
Purple Haze Soft Hackle
Hook - Daiichi Model 1740 (Size 12/Wet/Nymph Hook)
Thread - 8/0 UNI-Thread (Purple)
Hackle - Whiting Hen Cape Feather (Natural Black) - Stripped on on side
Rib - Monofilament (Clear/0.004")
Abdomen - One strand of Jaimeson's Spindrift yarn (165 Dusk/aka Tenkara Bum "Purple Haze")
Tail/Dorsal Stripe/Thorax - Six Strands of Pheasant Tail Fibers (Dyed Red)
(The theme of this tutorial is "EVERY WRAP COUNTS". I want to show the "hows and whys" of the construction of this fly, explaining my tying choices along the way. Hopefully someone will find this useful...)
Photo 1: The materials used in this pattern

Photo 2 (Prepared Materials):

Clockwise starting in upper left: Six Pheasant tail fibers (tips evened); Prepared hen hackle (fibers stripped off the right side side); hen hackle (as it comes from the cape); hook; single ply of the yarn.
Photo 3: Close-up view of the yarn used in this pattern

Photo of yarn from Jaimeson's website:

WEBSITE LINK: https://www.jamiesonsofshetland.co.uk/s ... -3-1-c.asp
DETAILED TYING INSTRUCTIONS (and the tying choices behind them)
With this tutorial, I would like to step the reader thru the detailed process of tying this pattern, and discuss each of the tying steps along the way.
Photo 4: Tye in the prepared hackle

Before tying in the hackle, prepare the feather by stripping off the fibers along one side of the feather. In this case, I need to strip off the fibers along the right hand side of the feather (if help tip upwards and glossy side facing you). This ensures that the feather can be wrapped all the way thru the thorax region, without over hackling the body.
When tying in the hackle, I like to tye it in with the hackle fibers starting at the outer edge of the hook eye. There should be roughly 1/8" of bare stem hanging out from the hook. Later on the tying process, this short section of bare hackle stem allows for precise placement of the hackle fibers at the beginning wrap of the body. It also helps to prevent twisting of the feather.
I like to lift the tip of the feather, to put a bend in the stem. Again this helps train the stem, and get the orientation of the feather aligned for wrapping.
Once the feather is tyed in by the stem, I trim it off near the midpoint of the hook shank. This helps add a little material in the abdomen area, which will cause this region to be slightly larger than the rear half of the fly. I do this to help form a slight taper to the body.
Photo 5: Add the mono rib

Tye in the strand of monofilament and wrap back to the midpoint of the hook, just a couple wraps beyond the end of the hackle stem.
Photo 6: Add another layer of thread wraps to the thorax region.

Wrap the tying thread back towards the eye of the hook, in close touching even wraps. Stop the thread, roughly one hook eye length away from the end. This leaves room later for the hackle wraps and head of the fly. It also helps form a slight forward taper at the front of the body.
Photo 7: Tye in the single strand of yarn

Tying in a single ply of yarn, then wrap back to the barb of the hook. Use close touching thread wraps, creating a smooth uniform underbody. Stop wrapping backwards when the thread is even with the barb of the hook.
Photo 8: Wrap thread forward again

Wrap the tying thread forward in close touching turns, stopping one hook-eye distance from eye of hook.
Photo 9: Wrap the yarn forward

Wrap the yarn forward to the eye of the hook. You can slightly adjust tension of the yarn warps, and the overlap of sequential wraps to help augment the taper of the body. Once you get the the front, secure the yarn with two firm wraps and clip off the excess.
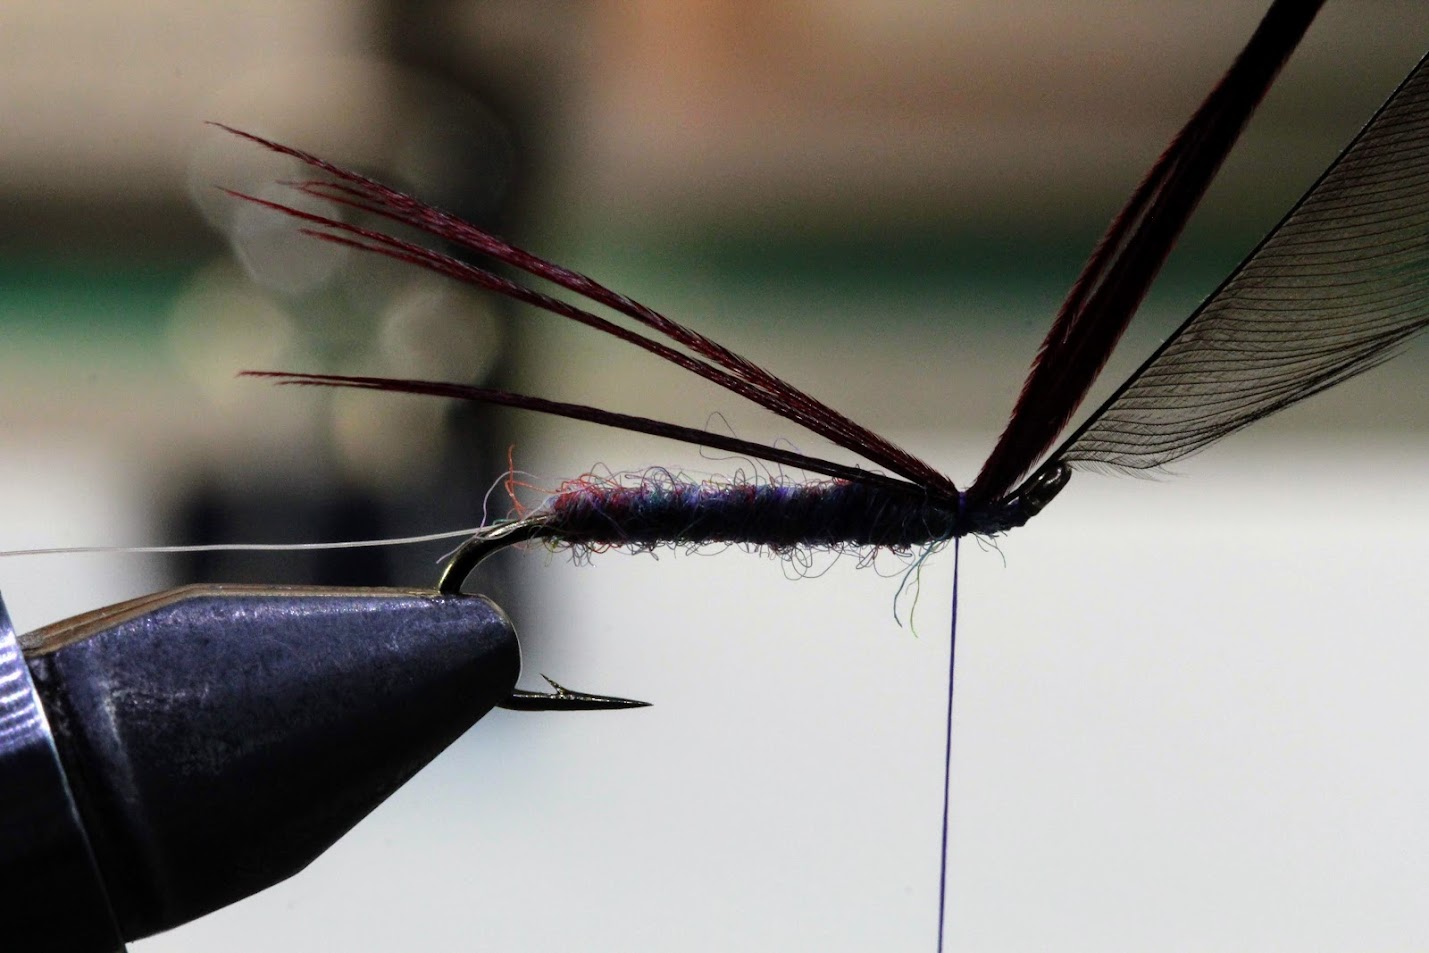
Photo 10: Add the pheasant tail fibers

Even the tips of the pheasant tail fibers, and then measure them along the length of the hook. The tail should extend roughly one-half the length of the hook shank. Tye in the fibers on the top of the hook. Leave the butt ends hanging out over the eye of the hook. The tip end pointing out over the bend of the hook.
I learned this method from Skip Morris. He uses in for his "Skip Nymphs" and is very easy and effective way to form the tail and dorsal stripe on a pattern.
Photo 11: Wrap down the thorax region

Wrap the tying thread back to the 1/3rd point of the hook shank. Carefully hold the tips of the pheasant tail fibers, to ensure they stay on the top of the hook. The thread wraps can be fairly gentle, so the tying thread does not cut thru the pheasant tail fibers. Avoid firm wraps, since they could compress the thorax region (undesired) and could damage the fibers.
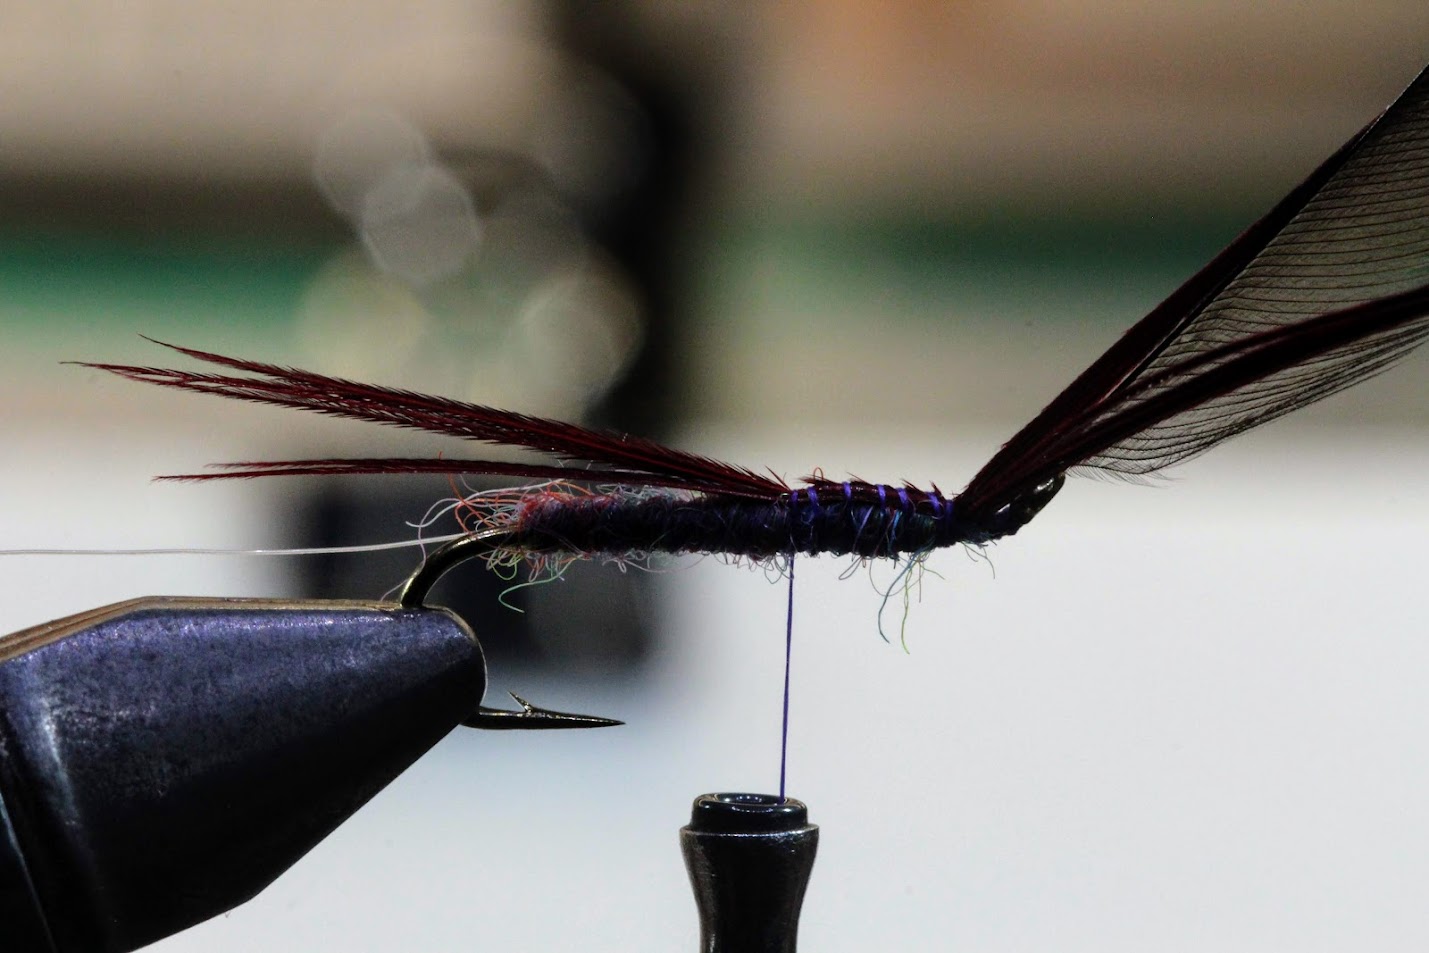
Photo 12: Secure the pheasant tail fibers in place

Wrap the strand of monofilament once around the hook shank at the back of the body (like it was a tag), then wrap forward in open spiral wraps. Carefully hold the pheasant tail fibers in place, along the top of the hook. The mono wraps can be pulled firmly downwards at each top wrap, which helps create segmentation and bury the rib into the yarn body. In theory, this will make a more durable fishing fly, by protecting the mono rib.
Photo 13: Form the thorax

Wrap the pheasant tail fibers (butt end) back to the tying thread. Secure with one or two firm thread wraps, then clip off the butt ends.
Photo 14: Clip off the butt ends of pheasant hackle fibers

Photo 15: Wrap the hackle

Grasp the tip of the hackle in a rotary hackle pliers, then make two full wraps directly behind the eye of the hook. Then make four open spiral warps back thru the thorax region, stopping at the beginning of the body. Make two firm wraps of thread, to secure the hackle. Then place the blade of your scissors agains the base of the hackle stem. A sharp tug will break off the hackle stem even with the body.
Photo 16: Form the head of the fly

Wrap the tying thread forward with open spiral wraps. Keep the tying thread tight (firm wraps), and gently wiggle back and forth when wrapping forward, The wiggle helps prevent trapping the hackle fibers when wrapping thru the hackle. By wrapping the thread forward (over the hackle stem and pheasant tail fibers underneath), the thread wraps reenforce the thorax and hackle stem.
This method creates a very durable fishing fly. The entire body is reenforced with the rib and the thread counter wraps.
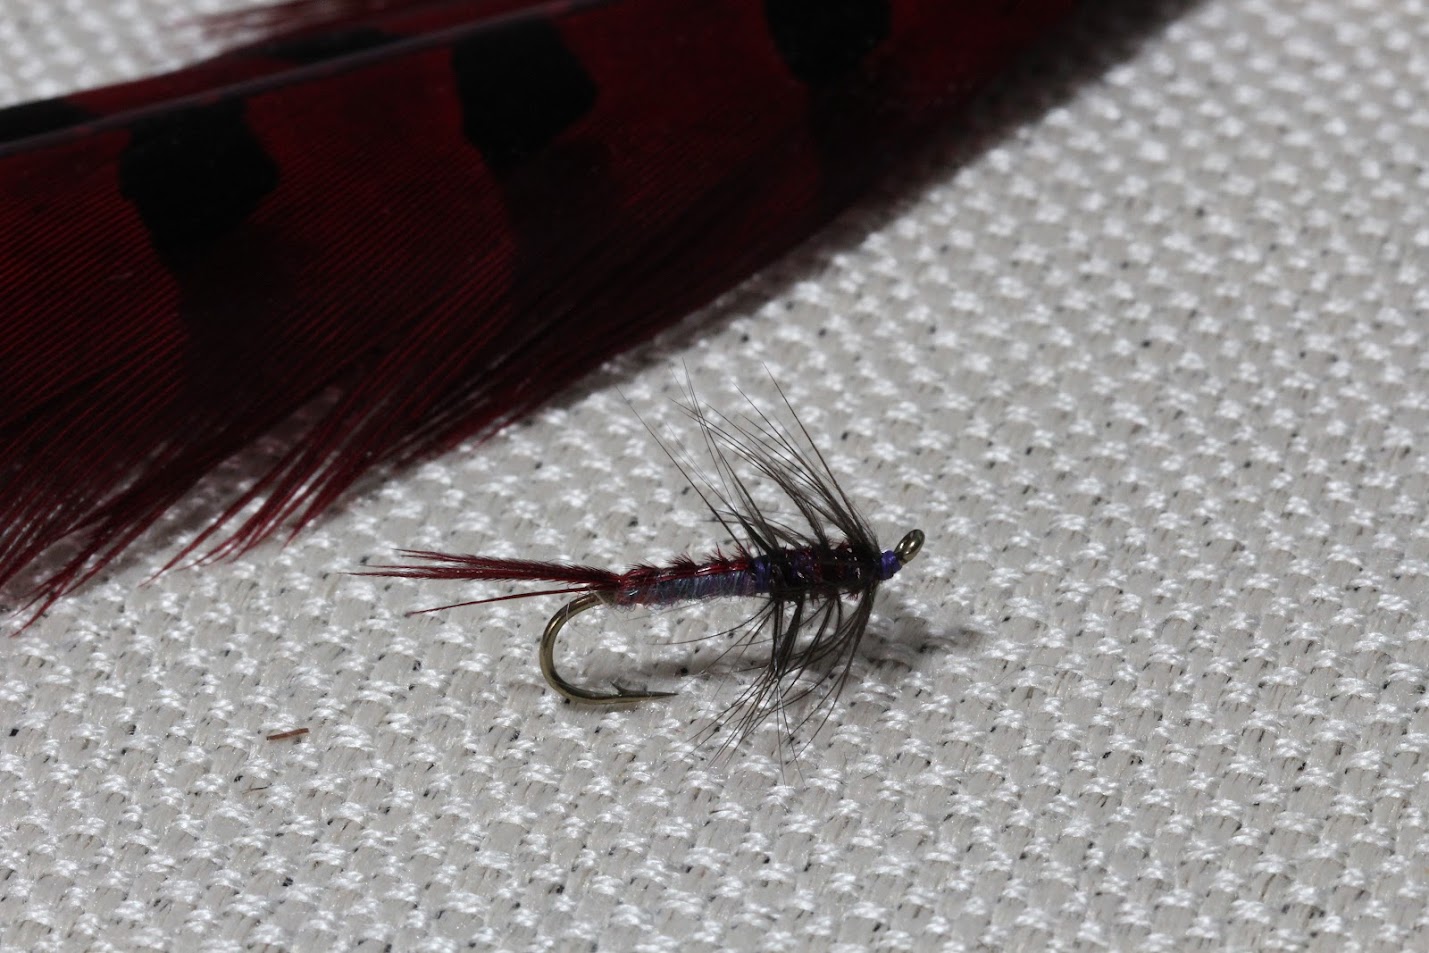
Photo 17: The finished fly

Supplemental Photos / These photos were take with my cell phone, so they are of lower quality.


Tweek the color a bit, and I think this pattern could pass for a decent stonefly imitation. I might flatten the body a bit, by tying the strand of year along both side of the body (fold it back in half when tying in, and hold the strands along each side of the hook shank. Anyway, just another way to adapt the tying techniques to suite what you want to imitate.
This pattern can be easily scaled up/down, and materials/colors changed to create countless variations. I hope you will give these a try, and take them for a swim.
Have fun!!!
Hook - Daiichi Model 1740 (Size 12/Wet/Nymph Hook)
Thread - 8/0 UNI-Thread (Purple)
Hackle - Whiting Hen Cape Feather (Natural Black) - Stripped on on side
Rib - Monofilament (Clear/0.004")
Abdomen - One strand of Jaimeson's Spindrift yarn (165 Dusk/aka Tenkara Bum "Purple Haze")
Tail/Dorsal Stripe/Thorax - Six Strands of Pheasant Tail Fibers (Dyed Red)
(The theme of this tutorial is "EVERY WRAP COUNTS". I want to show the "hows and whys" of the construction of this fly, explaining my tying choices along the way. Hopefully someone will find this useful...)
Photo 1: The materials used in this pattern
Photo 2 (Prepared Materials):
Clockwise starting in upper left: Six Pheasant tail fibers (tips evened); Prepared hen hackle (fibers stripped off the right side side); hen hackle (as it comes from the cape); hook; single ply of the yarn.
Photo 3: Close-up view of the yarn used in this pattern
Photo of yarn from Jaimeson's website:

WEBSITE LINK: https://www.jamiesonsofshetland.co.uk/s ... -3-1-c.asp
DETAILED TYING INSTRUCTIONS (and the tying choices behind them)
With this tutorial, I would like to step the reader thru the detailed process of tying this pattern, and discuss each of the tying steps along the way.
Photo 4: Tye in the prepared hackle
Before tying in the hackle, prepare the feather by stripping off the fibers along one side of the feather. In this case, I need to strip off the fibers along the right hand side of the feather (if help tip upwards and glossy side facing you). This ensures that the feather can be wrapped all the way thru the thorax region, without over hackling the body.
When tying in the hackle, I like to tye it in with the hackle fibers starting at the outer edge of the hook eye. There should be roughly 1/8" of bare stem hanging out from the hook. Later on the tying process, this short section of bare hackle stem allows for precise placement of the hackle fibers at the beginning wrap of the body. It also helps to prevent twisting of the feather.
I like to lift the tip of the feather, to put a bend in the stem. Again this helps train the stem, and get the orientation of the feather aligned for wrapping.
Once the feather is tyed in by the stem, I trim it off near the midpoint of the hook shank. This helps add a little material in the abdomen area, which will cause this region to be slightly larger than the rear half of the fly. I do this to help form a slight taper to the body.
Photo 5: Add the mono rib
Tye in the strand of monofilament and wrap back to the midpoint of the hook, just a couple wraps beyond the end of the hackle stem.
Photo 6: Add another layer of thread wraps to the thorax region.
Wrap the tying thread back towards the eye of the hook, in close touching even wraps. Stop the thread, roughly one hook eye length away from the end. This leaves room later for the hackle wraps and head of the fly. It also helps form a slight forward taper at the front of the body.
Photo 7: Tye in the single strand of yarn
Tying in a single ply of yarn, then wrap back to the barb of the hook. Use close touching thread wraps, creating a smooth uniform underbody. Stop wrapping backwards when the thread is even with the barb of the hook.
Photo 8: Wrap thread forward again
Wrap the tying thread forward in close touching turns, stopping one hook-eye distance from eye of hook.
Photo 9: Wrap the yarn forward
Wrap the yarn forward to the eye of the hook. You can slightly adjust tension of the yarn warps, and the overlap of sequential wraps to help augment the taper of the body. Once you get the the front, secure the yarn with two firm wraps and clip off the excess.
Photo 10: Add the pheasant tail fibers
Even the tips of the pheasant tail fibers, and then measure them along the length of the hook. The tail should extend roughly one-half the length of the hook shank. Tye in the fibers on the top of the hook. Leave the butt ends hanging out over the eye of the hook. The tip end pointing out over the bend of the hook.
I learned this method from Skip Morris. He uses in for his "Skip Nymphs" and is very easy and effective way to form the tail and dorsal stripe on a pattern.
Photo 11: Wrap down the thorax region
Wrap the tying thread back to the 1/3rd point of the hook shank. Carefully hold the tips of the pheasant tail fibers, to ensure they stay on the top of the hook. The thread wraps can be fairly gentle, so the tying thread does not cut thru the pheasant tail fibers. Avoid firm wraps, since they could compress the thorax region (undesired) and could damage the fibers.
Photo 12: Secure the pheasant tail fibers in place
Wrap the strand of monofilament once around the hook shank at the back of the body (like it was a tag), then wrap forward in open spiral wraps. Carefully hold the pheasant tail fibers in place, along the top of the hook. The mono wraps can be pulled firmly downwards at each top wrap, which helps create segmentation and bury the rib into the yarn body. In theory, this will make a more durable fishing fly, by protecting the mono rib.
Photo 13: Form the thorax
Wrap the pheasant tail fibers (butt end) back to the tying thread. Secure with one or two firm thread wraps, then clip off the butt ends.
Photo 14: Clip off the butt ends of pheasant hackle fibers
Photo 15: Wrap the hackle
Grasp the tip of the hackle in a rotary hackle pliers, then make two full wraps directly behind the eye of the hook. Then make four open spiral warps back thru the thorax region, stopping at the beginning of the body. Make two firm wraps of thread, to secure the hackle. Then place the blade of your scissors agains the base of the hackle stem. A sharp tug will break off the hackle stem even with the body.
Photo 16: Form the head of the fly
Wrap the tying thread forward with open spiral wraps. Keep the tying thread tight (firm wraps), and gently wiggle back and forth when wrapping forward, The wiggle helps prevent trapping the hackle fibers when wrapping thru the hackle. By wrapping the thread forward (over the hackle stem and pheasant tail fibers underneath), the thread wraps reenforce the thorax and hackle stem.
This method creates a very durable fishing fly. The entire body is reenforced with the rib and the thread counter wraps.
Photo 17: The finished fly
Supplemental Photos / These photos were take with my cell phone, so they are of lower quality.
Tweek the color a bit, and I think this pattern could pass for a decent stonefly imitation. I might flatten the body a bit, by tying the strand of year along both side of the body (fold it back in half when tying in, and hold the strands along each side of the hook shank. Anyway, just another way to adapt the tying techniques to suite what you want to imitate.
This pattern can be easily scaled up/down, and materials/colors changed to create countless variations. I hope you will give these a try, and take them for a swim.
Have fun!!!